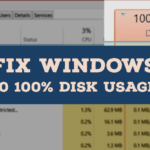
Windows 10 users might get this problem of 100% disk usage and somehow it happens often for low-end device users. There are some ways to Fix 100% Disk Usage on Windows 10. The below article contains the solution, just carefully follow our article.
How do you know that you have 100% disk usage?
Do you have any idea of getting know about your device reached 100% disk usage? Yes, you can easily identify if your device reached 100% disk usage which means you will face the issues of your device getting slowed, and you will be stuck with the page which you are currently using, these are the basic symptoms of 100% disk usage.
Before applying the methods make sure that you have issues because of 100% disk usage. Just check in the Task Manager and check the Disk percentage, if it is 100% undoubtedly you will face such issues as I mentioned before.
Also Check: How to Fix Error 0x80004005 On Windows
Fix 100% Disk Usage on Windows 10
The following methods are worth trying to fix your disk usage on your Windows 10 device. If one method doesn’t work for you then try out another method.
Disable Windows update
Due to windows auto-update, some of the users facing this disk 100% usage, so disable the auto-update of your windows device this may help to avoid this kind of issue. Let’s see the below steps, how to disable windows update.
Steps to Disable
- At first, open the Run command dialogue box by using the key (Windows+R).
- Now type services.msc and click on OK.
- Then you got the services page that contains local services running on your device.
- If you scroll down the page then you got the Windows update.
- Just double click on the Windows update then you got the dialogue box of windows update properties.
- There you can find the startup option, just make it as disabled.
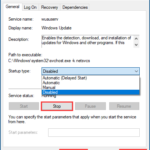
- Then click on Stop, then click on Apply and OK.
By doing the above steps, you can make your disk free from 100% and you can use your Windows 10 device without any lag.
Disable Antivirus
Antivirus like avast, AVG, Norton, etc has a chance to cause your disk usage. Check in the Task Manager whether the antivirus causing disk into 100%. If it is causing issues for your disk then you should turn off antivirus temporarily.
We gonna show you how to disable Antivirus. There are lots of antivirus present in the market but we choose one of the popular antivirus (Norton) to disable temporarily.
Steps:
- Open the windows Taskbar notification area.
- There you can find the Norton Antivirus icon then Right-click on it.
- Now click Disable Smart Firewall to temporarily disable the Firewall.
- Now click Disable Antivirus Auto protect to temporarily disable the anti-virus protection also you can mention disabling time.
BY doing the above steps you can disable the antivirus for a certain period also you can avoid 100% disk usage.
Disable Windows Search
Windows have a search loop that may cause your disk into 100% usage. So you can permanently or temporarily disable windows search. Let’s see how to disable Windows search permanently.
Steps to Disable Windows Search Permanently
- At first, open Run Command dialogue box by using the key (Windows + R).
- After that Enter services.msc and click on OK.
- Then you got the services window which is running on your device.
- Now you can find Windows search by scrolling the page and double click on it.
- Then you got the Windows search properties dialogue box.
- In the Startup option just change it into Disabled.
- Click on Apply and Ok.
Steps to Disable Windows Search Temporarily
The following steps are used to disable Windows search Temporarily.
- Open a Command prompt on your windows device.
- Now enter net.exe stop “Windows search” then hit Enter.
- This will temporarily stop windows search until you restart your device.
After doing the above steps now restart your device then check your device taskbar. If it is still 100% then try another method.
Rest Virtual Memory
Virtual memory is used the hardware and software to compensate for the physical memory shortage. When your RAM doesn’t have enough then the PC will temporarily store the file in virtual memory and sometimes that makes your disk 100% usage. To reduce the disk usage just rest your virtual memory.
Steps to Reset Virtual Memory
- Open Contol panel on your device then System and security » System
- Once the system screen is opened, from the left side of the screen you can find the Advanced System Settings, click on it.
- Then you get the system properties Dialogue box then go to the advanced tab.
- Now click on settings in the performance section.
- Again go to the Advanced tab then click on Change in the Virtual memory section.
- Make sure the selected radio button in No paging file then click on Set.
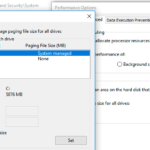
- Once the process completed reboot your device.
Upgrade Hard Drive:
You might be using some outdated version or mechanical Hard disk on your laptop or PC. The mechanical disk is completely outdated, Upcoming laptops are equipped with M2 data chip which much smaller than a Virtual drive.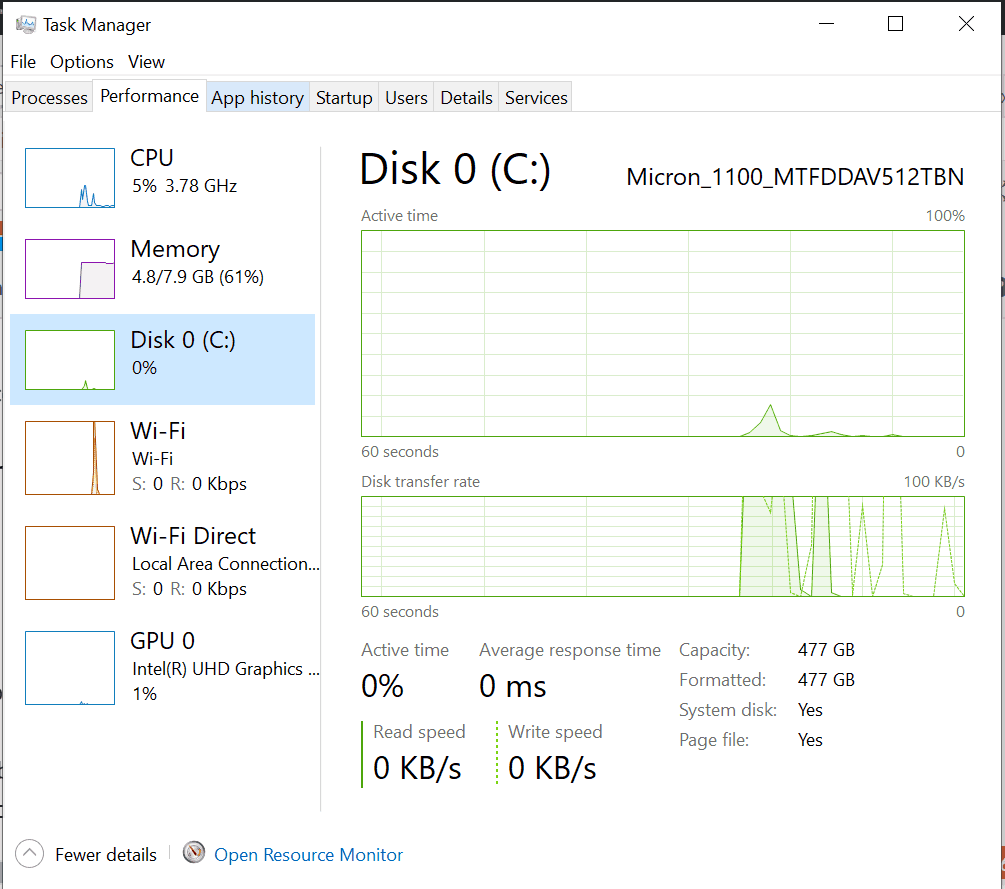
If your facing 100% disk usage after some windows update we highly recommend to upgrade to SSD( Solid-state Drive ) or M2 virtual card. If your board supports M2 we highly recommend to use M2 than an SSD.
Here is some great SSD drives that You can Buy from amazon with a Great discount of 40% on sale.
Final Verdict
The above methods will Fix 100% Disk Usage on Windows 10, each and every method is worth trying that reduce your disk usage percentage. If you’re using your device in 100% undoubtedly this will cause some issues and you will not use your device as faster, so try to avoid this kind of issue.